11.17.2011

Opening the mold

After repeating the process for the back half of the mold, this morning I went out to the shop and separated the mold halves to see if I was successful.

The anxiety with molds, especially multi-part molds, is the investment of time. You have to completely finish the project before you can know if the very first layer of gelcoat actually cured out.. or if the plug was prepped well enough to release from the tool.. or if print through has ruined the mold surface.. etc.

This mold was a six week project. The details between all of the steps have been skipped here. Between each picture there were usually days of sanding or spraying or buffing or sweating, often just to fix a mistake. Each small step took a painful amount of time.

Another week will be spent improving the mold surface for production quality - and constructing jigs and flanges that will allow me to pull a joined and fully completed part from the mold without any work after the layup process beyond drilling a few holes and buffing out the finish.


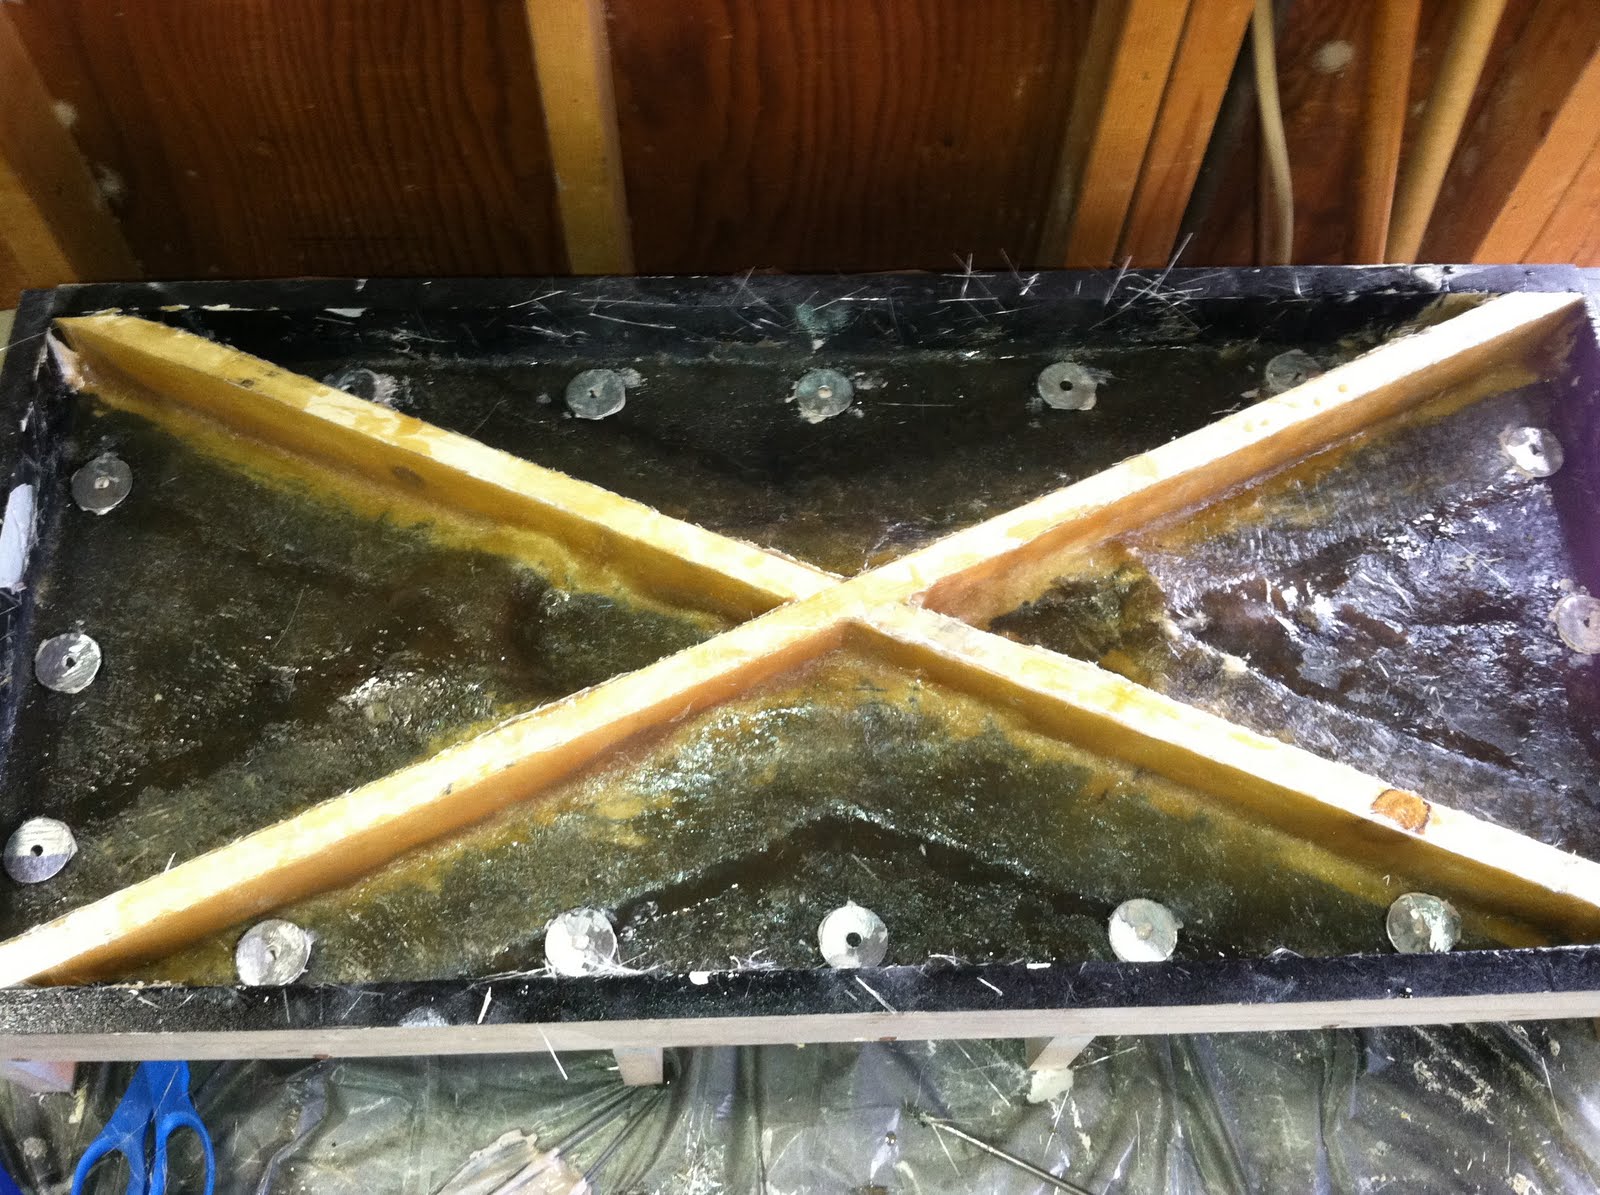
Cross-bracing the back side mold, just like the other side. Bondo is used to space the wood away from the glass, preventing print through and pooling of resin under the wood - which would go nuclear during the curing process and compromise the mold surface underneath.


The final step: glassing the cross-braces on as well as the 16 tee nuts that will align and join the mold halves later. Bolts are already holding everything together and will be broken free of the resin with an impact drill later.


Sneak peak.. All is well inside the mold. The roughness and flaking is left over mold release film that hasn't been cleaned off. The mold surface looks awesome. The plug broke in half in the process of removing it, but I was expecting that considering the lack of relief in the gps and vario boxes. Same thing happened on the Geko/6030 mold.

11.11.2011

mold making pt.2

The front mold half is finished and being prepared for the layup of the second this weekend.


Stabilizing boards were added to prevent warping and curving. Attached with bondo first to insulate them from the glass itself and prevent resin from pooling underneath and printing through to the mold surface.


Next, they're glassed on.


Fender washers are glassed around the perimeter to give perfect bolt alignment later.


Here's the mold fresh off the parting tray after some wet sanding. Next, wet sanded down to 1500, polished, and then waxed endlessly.


Here's the front side mold after two days of waxing.. two more coats today and the gelcoat for the back mold gets sprayed.

11.04.2011

The mold for the new 6030/garmin 76 pod is cruising along. The new pod features a pressure fit for the 76 just like my Geko pod (except the 76 has a slot for securing a safety cord). The 6030 slot also has a cutout to allow downloading without removing the instrument. Mounts will be the same, but the rod will be grade 8 instead of stainless in order to support the greater mass of the new pod.

First step: rough cut and generous bondo use.


This is what it looks like after hitting the belt sander and rounding the profile a bit.


Gray primer helps show irregularities in the shaping process.


A parting tray is built to create a line for dividing the two mold halves.


The plug is positioned and dammed up with bondo to create a perfect parting edge.


Primer is sanded and polished to create a nice finish on the parting flange. A huge flange was chosen to allow for resin infusion process if I decide to go that way.


I walled up the parting tray to avoid the mess of spilled resin, overspray, and cutting the mold edge after layup.


Black tooling gel was sprayed through a siphon gun until about 20 mils thick to create a hard, durable surface capable of producing many parts.


Two layers of resin and chop fiber were layed up on the tacky gelcoat to stabilize it and prevent shrinkage overnight. This is where it's at now.. more later.